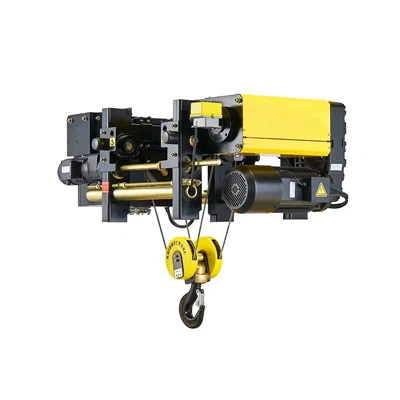
Hey there, if you’ve ever dealt with stage hoists on a gig, theater show, or studio production, you know how critical it is to get that lifting chain or wire rope tension just right. Mess that up, and you’re looking at uneven scenery movement, premature wear, or even something way more serious—safety risks that no production team wants to deal with. As someone who’s been in the electric stage hoist game for years, working with teams all over to keep their lifts running smooth, I’ve seen my share of tension blunders (and fixed a lot more too). Today, I’m breaking down how to adjust that tension properly, like the pros do, so you can skip the headaches and focus on the show.
First off, let’s keep it real: this isn’t a one-size-fits-all fix. The steps change a tiny bit depending on if you’re dealing with a chain hoist or a wire rope hoist, but the core goals are the same—even load distribution, no slack that causes jolts, and zero over-tension that’s chewing through your parts. Before we jump into the adjustment steps, a quick heads up: always start with a full pre-check of your hoist. If your chain is kinked, your wire rope has frays, or any bolts are loose, fixing those first is non-negotiable. You can’t adjust tension on a hoist that’s already damaged, period.
Let’s start with the basics: why does tension matter here anyway? On stage, you’re lifting trusses, lighting, speakers, scenery pieces—stuff that needs to move level, fast, and safe. If one chain is looser than the other, your truss will tilt mid-lift, which not only looks bad but can throw off balance and strain the hoist motor. Over-tension, on the other hand, puts way too much stress on the chain/wire rope, the hoist gears, and the brake—shortening its lifespan big time. Even the best gear, like the ones we recommend for entertainment and stage work, needs proper tension to perform. Speaking of which, if you’re in the market for reliable hoists to match your setup, check out our Entertainment Truss Winches Lifting Hoist line—built specifically for the unique demands of stage and studio lifting.
Now, let’s get into the actual adjustment process. I’m going to split this into two main types: electric chain hoists and electric wire rope hoists, since those are the two most common for stage use. I’ll keep it simple, no jargon overload, just actionable steps.
First, electric chain hoists (super popular for smaller to mid-sized productions, theaters, and studios). This is the one I see most folks ask about because chains can stretch a little over time, especially with heavy use. Here’s how to adjust tension step by step:
- Shut everything down first—no shortcuts. Lock out/tag out the hoist power so it can’t turn on while you’re working. This is rule number one, always.
- Lower the load to a safe height. Not all the way to the ground, just low enough so the chain has slack you can work with, and there’s no weight pulling tight. If you don’t have a load on it, even better—adjust the tension on the empty chain first.
- Locate the tension adjustment point. On most chain hoists, this is either at the motor end (where the chain connects to the drive gear) or at the trolley that moves the hoist along the truss. It’s usually a bolt or a nut you can turn with a wrench.
- Adjust the tension evenly. This is key—don’t crank one side tight and leave the other loose. If you have two chains (most stage lifts use a pair for balance), turn the adjustment nuts on both sides a quarter turn at a time, alternating between them. Go slow, don’t overdo it. For a visual example of how these chain systems work, take a look at our Chian Hoist Entertainment Truss Lifting Machine page—we post close-ups of adjustment points there for reference.
- Check for slack and stretch. After adjusting, lift the load a few feet up and stop. Look at the chain—there should be no more than a half-inch of slack between the links when you pull gently sideways. If it’s still loose, go another quarter turn on both nuts. If it’s too tight (you can barely move it sideways), loosen them a tiny bit.
- Test it out. Do a slow full lift and lower, then check again. If it moves level, no tilting, you’re good.
Now, wire rope hoists—common for heavier loads, like big trusses with multiple speakers or stage backdrops. Wire ropes are stiffer than chains, but they can stretch too (especially new ones) or develop kinks that throw tension off. Adjusting these is a little different:
- Same safety first—lock out/tag out power, lower load to a safe height. No exceptions here, wire rope lifts hold way more weight, so messing up is way riskier.
- Find the rope tension adjuster. On wire rope hoists, this is usually at the end where the rope attaches to the hoist drum, or at the anchoring point where the rope is fixed to the building structure. It might be a turnbuckle (common for stage setups) or a bolted adjustment plate.
- Even adjustment again. If you have two wire ropes lifting the same load, work on both adjustment points equally. Turn the turnbuckle a half turn at a time on each, or tighten the bolted plate a little on both sides. Why equal? Again, balance is everything—unequal tension on wire ropes will cause the drum to wrap the rope unevenly, leading to frays and early failure.
- Check the drum wrap. Wire rope should wrap around the drum in neat, side-by-side layers—no overlapping or crossing. If it’s overlapping, your tension is off. Lift the load a foot or so and stop, inspect the drum. If the rope is misaligned, adjust the tension a tiny bit on the looser side (so actually, if one side is causing overlap, that one might be slightly over-tight, so loosen it a hair, then tighten the other to match).
- Do a load test with a level. Grab a spirit level and set it on the truss or load you’re lifting. Lift it slowly, and if the level tilts, adjust the tension on the side that’s lower. Small adjustments go a long way here—half a turn on the adjuster can fix a noticeable tilt.
Wait, a quick pro tip for both types: when you’re doing adjustments, mark the original position of the adjuster bolts or turnbuckles with a marker before you start. That way, if you over-adjust, you can easily go back to where you started instead of guessing. I’ve saved so much time doing that over the years—no more second-guessing if you messed up the setting.
Also, let’s talk about common mistakes I see people make. First, adjusting tension with the load still attached at full height—never do that. The weight is pulling the part you’re adjusting, so you’ll get a false reading once you lower the load. Second, over-tensioning to “prevent slack” is a bad call. Like I said earlier, too much tension wears out the hoist faster. Our D8 Plus Electric Hoist Stage Lifting Equipment is built to handle consistent, proper tension without extra stress, so if you’re replacing old gear, that’s a solid pick. Third, skipping regular tension checks. Even if you adjust it once, every few months (or after a big show with heavy loads), double-check it. Chain and wire rope stretch over time, especially with frequent use.
Another thing: if you’re working on a portable stage or a studio that uses lifting equipment that needs to hold its brake tension, that’s tied to hoist tension too. A loose chain or wire rope can mess up the brake’s ability to hold the load, which is a huge safety no-no. Our Portable Stage Lifting Equipment for Theatres & Studios – Maintenance-Free Brake line is designed with brakes that work best when tension is set correctly, so that’s a good combo if you’re looking for all-in-one reliability.
Wait, what if you’re dealing with a multi-point lift? Like, four or six hoists lifting one big truss? That’s a step up from two-point, but the same logic applies. Adjust each hoist’s tension one at a time, starting from the front two, then back two, alternating sides. Lift a little, stop, check level, adjust, repeat. Don’t try to do all adjustments at once—you’ll end up with lopsided tension.
Let me also cover when you shouldn’t adjust it yourself. If your chain has visible frays, kinks, or broken links, or your wire rope has broken wires or corroded spots, don’t mess with tension—get a tech to check it first. Adjusting tension on damaged gear won’t fix the problem, and it’s risky. Same if your hoist is making weird noises when lifting—grinding, squealing, anything out of the ordinary—stop, power off, and get it looked at. Safety trumps all, always.
Now, after you’ve adjusted the tension, what’s the next step? Document it. Write down the date, the adjustment you made, how much you turned the adjuster, and the load it was for. That way, next time you check, you have a reference point. It takes 2 minutes and saves you 20 minutes of troubleshooting later.


At the end of the day, adjusting your electric stage hoist’s chain or wire rope tension is all about balance, slow work, and never cutting safety corners. It’s not rocket science, but it does need attention to detail to keep your production running smooth and everyone on set safe. If you’re in the market for new hoists that are easy to adjust and built for stage use, we’ve got the lines linked here to check out—just reach out if you have questions about which setup works for your space. We work with small theaters, big concert venues, and everything in between, so we can help you find the right fit.
When you’re ready to upgrade or add new lifting equipment, don’t hesitate to connect with us to talk through your needs—we’re here to help you get the right gear and keep your lifts working at their best.
References:
- OSHA 29 CFR 1910.268, Telecommunications, Power, and Hoisting Equipment Safety Standards
- Stage Managers’ Association (SMA) Technical Guidelines for Electric Hoist Operation
- National Fire Protection Association (NFPA) 70, National Electrical Code, for Stage Equipment Power Safety
- American Society of Mechanical Engineers (ASME) B30.16, Overhead Hoists Standards
- Entertainment Technology Center (ETC) – Stage Lifting Equipment Maintenance Best Practices