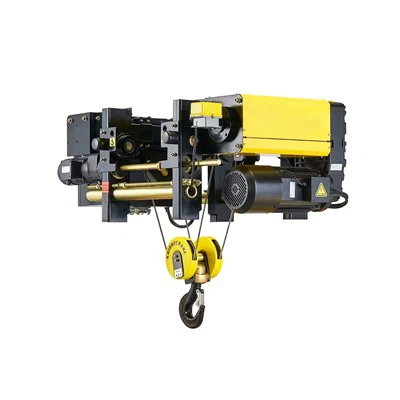
As a trusted supplier of electric stage hoists, I understand the importance of maintaining and replacing components to ensure the smooth operation of your equipment. One of the critical components that may need replacement over time is the motor. In this blog post, I'll guide you through the process of replacing the motor of an electric stage hoist, step by step.
Step 1: Safety First
Before you start any work on the electric stage hoist, safety should be your top priority. First, make sure the power supply to the hoist is completely turned off. This can prevent any accidental start - up that could lead to serious injury. Wear appropriate personal protective equipment (PPE), such as safety glasses, gloves, and steel - toed boots. Also, set up barriers around the work area to prevent unauthorized access.
Step 2: Gather the Necessary Tools and Materials
To replace the motor, you'll need a set of tools. A socket wrench set is essential for removing bolts and nuts. A screwdriver set, including both flat - head and Phillips - head screwdrivers, will be useful for removing covers and panels. You may also need a wire cutter and stripper for disconnecting and reconnecting electrical wires.
In addition to tools, you'll need a replacement motor that is compatible with your electric stage hoist. As an electric stage hoist supplier, we offer a wide range of high - quality motors designed to fit different models of hoists. For example, the D8 Plus Electric Hoist For Concert Stage has a specific motor requirement, and we can provide the exact replacement part.
Step 3: Disconnect the Electrical Connections
Locate the electrical box of the electric stage hoist. Open the box carefully using a screwdriver. Inside, you'll see a series of wires connected to the motor. Before disconnecting any wires, take a clear picture or make a detailed diagram of the wiring connections. This will help you reconnect the wires correctly later.
Use the wire cutter and stripper to carefully disconnect the wires from the motor. Make sure to label each wire if possible, especially if the wiring is complex. After disconnecting the wires, secure them to prevent any short - circuits.
Step 4: Remove the Mounting Bolts
The motor is usually mounted to the hoist frame with a set of bolts. Use the socket wrench to loosen and remove these bolts. Be careful not to drop the bolts as they can be easily lost. Place the bolts in a safe container.
Some motors may also be secured with additional brackets or clamps. If so, remove these components as well using the appropriate tools.
Step 5: Remove the Old Motor
Once all the mounting bolts and additional securing components are removed, carefully lift the old motor out of the hoist. The motor can be heavy, so make sure to lift it with proper technique to avoid injury. You may need an assistant to help you with this step, especially for larger motors.
Step 6: Prepare the New Motor
Before installing the new motor, check it for any visible damage. Make sure all the mounting holes and connection points match those of the old motor. If there are any protective covers on the new motor, remove them.
Step 7: Install the New Motor
Lower the new motor into the position where the old motor was located. Align the mounting holes of the motor with the holes on the hoist frame. Insert the mounting bolts and tighten them using the socket wrench. Make sure the motor is firmly secured to the frame.
Step 8: Reconnect the Electrical Wires
Refer to the picture or diagram you took earlier and start reconnecting the electrical wires to the new motor. Use the wire stripper to expose a small section of wire and connect it to the appropriate terminal on the motor. Make sure the connections are tight and secure.
After reconnecting all the wires, close the electrical box and secure it with the screwdriver.
Step 9: Test the Hoist
Before using the electric stage hoist again, it's crucial to test it. Turn on the power supply to the hoist. Operate the hoist in a safe and controlled environment, such as a test area. Check if the hoist moves smoothly and if the motor is running without any abnormal noises or vibrations.
If you notice any issues during the test, turn off the power immediately and re - check the installation. It could be a problem with the wiring connections or the motor installation.
Additional Considerations
- Chain and Winch Compatibility: When replacing the motor, also consider the compatibility with the stage hoist chain and other components. A more powerful motor may require a stronger chain to handle the increased load.
- Truss Lifting Hoist: For Stage Winch Truss Lifting Hoist, the motor replacement process is similar, but you need to pay extra attention to the alignment and balance of the hoist to ensure safe truss lifting.
Conclusion
Replacing the motor of an electric stage hoist is a task that requires careful planning and execution. By following these steps, you can ensure a successful motor replacement and keep your hoist in optimal working condition.
As a leading electric stage hoist supplier, we are committed to providing high - quality products and excellent customer service. If you have any questions about motor replacement or need to purchase a replacement motor, please feel free to contact us for further details and to start a procurement negotiation. We are here to assist you in finding the best solutions for your stage hoist needs.


References
- "Electric Hoist Maintenance and Repair Guide", Industry Standard Handbook
- Manufacturer's Manual for Electric Stage Hoists